Controlling the Light…
The greatest challenge that any nature photographer faces is trying to capture what they see in front of them in a medium that has its limitations. And since I began posting my photography on the Internet, one of the most common questions I get is how do I get the range of light and color in the pictures that I capture. I’d like to take a bit to offer some insight this morning…
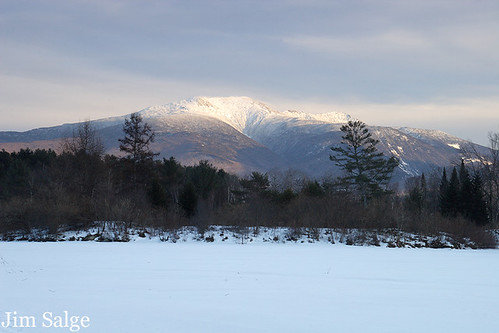
The first reason that my photographs are so full of color is that I limit my shooting to scenes that lend themselves to great color, and great color renditions. For example, last Saturday night in Sugar Hill, NH, I was fortunate enough to witness a great display of alpenglow falling upon the Franconia Ridge. The light was fantastic, but brief. There are less than 20 minutes in time between the two scenes below. Making sure that you are in the right place and the right time is the most critical part of landscape nature photography.

And…less than 20 minutes later…

However, capturing rich, dynamic and saturated images goes well beyond pointing the camera at good light. The problem with this is that the camera sensor can only capture about 7 stops of light. Essentially, what this means is that the human eye is able to see a much much greater latitude of light, from shadows to highlights, than the camera. This is why when you take a shot of a sunset, often times everything else is in silhouette. While this can be a nice creative touch to a photograph, my goal is always to capture a scene as the eye sees it, and therefore I employ some classic tools for landscape photography.
There are three lens filters that I carry with me at all times to control the light entering my camera. Each provides a different piece in the puzzle that when put together properly, can capture the true beauty of the scene in front of you.
These include:
- The Polarizer. This filter allows you to control contrast, cut glare, darken skies, and increase saturation with the spin of the front element of your lens. If you’ve ever worn a pair of polarized sunglasses, you know the effect. This filter almost never leaves my lens…
- The Neutral Density filter. This filter is just a piece of gray glass that is designed to lengthen the amount of time that the shutter exposes the scene by cutting the amount of light reaching the sensor. Classically used to make river and stream shots silky smooth, I find that long exposures allow for much more color intensity. You get all of the color and luminosity of a scene without the intensity of the light.
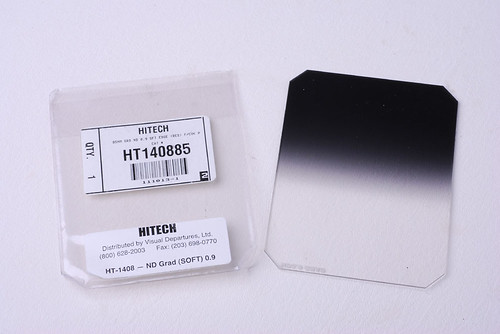
- The Graduated Neutral Density filter. Pictured below, this half gray, half clear filter can balance out the difference in light between bright skies and shadowed foreground. I carry five of these with me at all times, ranging from light gray to nearly black, and believe that the use of these define my style of landscape photography.

It’s important to note that this style often leads to sunrise and sunset exposure times that range from 2 to 20 seconds long. A rock solid tripod is therefore essential to capturing dramatic and dynamic light.
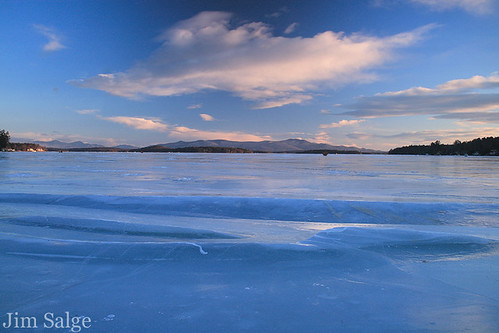
It is also important to note that this stacking of filters can easily be taken too far, and it’s important to learn how each tool works, how they compliment each other, and when it all becomes too much. For example, about a half an hour after sunrise on the big lake Sunday morning, I over polarized and increased the exposure too long. The scene lacks contrast, and the color rendition is far too blue to be natural. This highlights the need to practice, know the light, and know how to use your tools to capture it.

The risks of too many filters...not ideal!
My traditional solution surprises many in this world of technological integration into photography. I try to minimize the use of Photoshop to post-process the images I capture. While I admit, this is an important step, for me, the ‘pre-process’ is much more important, and honestly enjoyable. To me, there is nothing better than being immersed in magic light, stacking the filters, looking down, and seeing on the LCD that you’ve nailed the shot!
I hope that this answers many of your questions, and that this sheds some light on my technique and style. Please feel free to leave comments and questions below!


Jim,
Good synopsis! Just wanted to add that using the polarizer alone will result in some light loss, ~2 stops average. So for those not familiar with the effects, using a polarizer and ND filter together may result in more light reduction than planned!
Cheers,
Bruce
You are absolutely right Bruce…merely putting a polarizer on during the magic hour usually pushes your exposure beyond what can be handheld. And the polarizer alone can really make a scene pop! That’s the one filter everyone should own!
I find that for the increased saturation effects that I go for though…you need both. I’ve been pushing exposures recently, and really like the effect!
Jim,
Thanks for sharing information like this. It is really helpful. What do you use to mount the filters? You take great pictures.
Thanks Dennis!
I use a Cokin filter system holder, which has a screw fitting that goes into you lens. It can hold three filters…and my polarizer never leaves it. I’ll try to post a picture here some time next week…but I’m off on a hike for a bit…
Excellent post Jim and very helpful. I notice that it looks like you use the cokin filter system. Do you use these on all your lenses or just one? I am assuming that if you use this system you must like it. I have been researching filters for a new wide angle i am getting. All i here is that it is not worth using a filter with this lens (tokina 11-16mm) due to vignetting. And I read that the plastic filters of Cokin were not that good in quality. Too much info and don’t know what to believe. And when i asked about how i was supposed to blur water without using a ND filter, i was told to use exposure compensation. This doesn’t sound like it will get me the effect i would be after. Any suggestions for this type of lens?
Hi Robyn,
A couple great questions in there.
First off, yes I do use the cokin system, but not the cokin filters, as I agree with your assessment of them. I use HiTech, and stand by them for their economy and quality.
For wide lenses, it’s tough…a polarizer leads to banding, and the filter holder will get in the view at 15mm and wider with a Cokin P series holder. Cokin does make a larger holder, as does lee, and this might be your only option for the super wide stuff. Perhaps others can weigh in too…
And no…exposure composition is not your answer. Too much light is too much light…you gotta cut it or shoot only dawn and dusk…
Jim, As I was driving back from New Jersey today, I had 7 hours to consider how I could improve my shots, so they look more like what I see with my eye. It is an amazing blessing that on arriving home, settling down, and picking up my computer, that you direct me to a blog that helps answer that question so well. Clearly, I need to go purchase several filters. Can you give me an idea of what to expect cost wise? I have a Nikon Coolpix 90 and I am hoping the filter system applies for most cameras. I am excited about trying something new and advancing in photography technique. Thanks so much. I will save this blog in my bookmarks to refer back to it. Jan
Hi Jan,
Most cameras can fit / retrofit a filter ring onto the front element of the lens. From there, what you will need is a ring to fit a square filter holder on it, about a $10 expense. Then a square filter holder, perhaps Cokin brand, ‘P’ sized, maybe $20.
From there, the price jumps. A circular polarizer that fits a cokin P will start at about $30 on ebay for an non-name brand, up to $80/$90. And each Hitech ND / GND filter will run you about $30. Full set up, probably about $200?!
One last thing, I found that the HiTech filters scratch fairly easily and I have a microfiber case that I put mine in, another expense, but well worth the investment. The brand I have is Kinesis for the pouch.
Hope that helps!
So Jim: what is the widest you tend to shoot with your Cokin Filter holder? Are you saying that if I shoot at 18mm there will be vignetting and banding? I usually shoot a lot of my landscape shots (especially with vertical orientations) at 18mm.
Hi Shawn…
A couple answers to your question. For Polarizer, you start to get banding at about 24mm. If you can put the banding in the right spot, you can certainly shoot wider, but the polarizer is the only filter you have to worry about with the banding.
Vignetting on the Cokin P holder starts at about 14mm. Which I don’t find all that limiting…and at 18, there are no problems with the ND/GND filters.
Hope that helps…
Thanks for sharing, Jim. With the filter holder, would you still be able to screw a round polarizer onto the lens underneath the holder, thus avoiding the need for a square/rectangular polarizer?
You certainly can put a polarizer on first, but that might induce vignetting at focal lengths a bit tighter. The whole cokin filter is designed to spin, and cokin style polarizers spin inside the square holder…so it’s not all that limiting to use the cokin polarizer…